Saturday, March 30, 2013

Chicken Curry with Cauliflower "Couscous"


I love curry, Thai and Indian being the most widely known, each has their own flavors, and both are delicious.  the great thing about curries is that they themselves are low carb.  Rice and the vegetables they use are the kicker to the low carb diet.  but, with careful consideration on veg, and a little trickery with the rice, the deliciousness that is curry can be had, for 7 grams of carbs.

Ingredients:
1-1/2 chicken breasts
1 head of cauliflower
1 can Thai Kitchen lite coconut milk
2 Tbsp Hot Madras Curry powder
1 Tbsp Garam Masala
1 tsp garlic powder
1 tsp onion powder
1 tsp Cayenne pepper
1 Tbsp Ghee
1 Tbsp whole butter
1 cup frozen green beans
S&P to taste


Cut chicken into bite size pieces, and coat with the Garam Masala and half the curry powder.

Sear the chicken, partially to give the chicken flavor, and also to toast the spices that coat it.  Use a bit of your preferred fat, I used some of the Ghee from a previous entry, but normal butter, or coconut oil would both be good options, although if using whole butter, you may want to add a higher smoke point oil to prevent burning the butter.

Remove the chicken from the pan and put it into a dutch oven/deep pot.  There will be brown burnt bits on the bottom of your saute pan, this is called fond, and its basically pure flavor. Add your coconut milk into this pan while its on the heat, and scrape.  Once you have removed all the bits off the pan, pour that in with you chicken, along with the rest of your spices, set it on medium-low heat and simmer.

After 25-30 mins, add your green beans, or any low carb veg of your choice, remove the lid and let the sauce thicken.  the lite coconut milk is very thin, so you want to let it really cook down.

This is the cauliflower "couscous".  what I did was shave the little florets off the top of the cauliflower with a really sharp knife.  Now I know what you are thinking, what about all the stalk... save it for mash or soup.  take the cauliflower buds and in the pan, add about 1/4 cup of water and 1 Tbsp of butter.  as the water cooks the cauliflower it will evaporate, you want all the water to be out of the pan, at this point the butter will start to fry the now cooked cauliflower. season with salt and pepper. 

This is the finished dish, the recipe serves 2.


Thursday, March 28, 2013

Jerk chicken wings


I love chicken wings, but buffalo is so boring.  these spicy wings have a hint of sweetness, but without sugar.  With a kick from cayenne, and with only trace carbs from the spices, they are a fit for any stage.


Ingredients:
8 whole wings
 2 tsp all spice
1 tsp cinnamon
1 tsp nutmeg
2 tsp cayenne (or less if you are wimpy to heat)
1 tsp onion powder
1 tsp dried thyme
Salt to taste
oil to coat

Preheat oven to 450°F

Combine dry spices and set aside.  on a baking sheet, spread your wings out and coat liberally with oil.  once coated, dust the chicken very liberally with the spices, stir them around to insure even coating then put in your oven.  set your timer for 5 min, then flip, another 5 mins, then crank the oven down to 400° and let back until the skin is crispy and the meat is done.  15-20 min.

serve with whatever you want, or just eat the whole plate by yourself, I am not ashamed to say I did.

Wednesday, March 27, 2013

Home made Mozzarella


Cheese.

Cheese is my addiction, I love it.  from fragrant bleu, to soft, velvety brie, Cheese is one of the few foods that can go well with any course in a meal, from a starter, to desert.  Long story short, Cheese is my bacon.

I have been toying with the idea for some time to make my own, however Citric Acid, has been my Achilles heel. online you can find it in bulk, but I don't have a use for a pound of sour stuff in my cabinets, and none of my local pharmacies carry the cap form.  so it has been a real conundrum.  However, this past Monday I had my Eureka moment, and found that the local "health food" store had it in their bulk spice boxes, thus began the journey that followed.

Let me add one side note before I continue.  do not attempt this, as I so foolishly did, at 7pm after a long day at work, your desire for cheese will be tempered by your desire to sit down.

Now that we have that out of the way, let us begin.


Ingredients:
1 g. Whole milk. Raw is preferable, but Pasteurized is fine, it cannot be Ultra-pasteurized, so you will have to splurge on the more expensive brand.
1/2 of a tab of Rennet
1+1/4 teaspoon of Citric acid
3/4 cup of non chlorinated water
3-4 Tbsp of sea salt, or any non-iodized salt

In a large non-reactive(no aluminum or cast iron) pot, pour your milk in and set on medium heat. While it is heating, take 1/2 water and dissolve the citric acid and in a seperate container the 1/4 water and rennet tablet.

Once the Milk gets to 90°F add your citric acid, stir for 30 secs then add your rennet, stir for another 20 secs, then remove from the heat, put the lid on and wait.

around 30 mins after, this is what your milk will look like.  it is separated into curds and whey. the process from this point is simple, strain the curds into a bowl, press to remove liquid, then put in the microwave for 1 min, drain excess whey again, microwave for an additional 35 seconds, then remove.  you should have a very soft, yet sold mass of cheese, if you still have whey drain and continue to microwave at 5 second intervals until you get to melty goodness. Unfortunately my hands where covered in whey and cheese curds so I didn't take any photos of the during phase, but if you are confused there are tons of videos on youtube to show you the procedure of making it.


Ciligine, or small cherry size, are my preferred size for fresh mozzarella. you want to take a cup of water and 2 Tbsp of salt and put them for at least a day for the best flavor.  afterwards you can get Olive oil, a little balsamic vinegar, red pepper flakes and oregano and make marinated mozzarella, its simply divine.

this was an experiment I did, it is a take on Burrata.  Burrata is a Mozzarella that is filled with cream, I took the still warm kneaded mozzarella, put about a Tbsp of cream on top the flattened cheese, and rolled it up.  fresh cracked black pepper, a few drops of red wine vinegar, and served it with Giardiniera, or picked cauliflower and bell pepper. the sharp tartness of the pickled vegetable was perfect to cut the extremely rich cheese.


In closing, the amount of cheese to milk ratio is small, but there is nothing comparable to this, not even the most expensive store bought fresh mozzarella hold a candle to it.  I will be doing this again. 

Tuesday, March 26, 2013

Avocado Vinaigrette


Avocados...

I know they are very high in Potassium, fat, and all that good stuff that us Ketonians need, but man, I really don't like them.  However, being strapped for foods rich in potassium, and my preference to try and get as much nutrients from food rather than supplementation, I have decided to try and find 5 ways to incorporate avocados into my repertoire. As I discover them, I will report back with my recipes, and hopefully they can help a few of my fellow ketoers whom the idea of eating hunks of avocados makes you queasy, and of course, those tired of Guacamole.


I had an avocado salsa at a Mexican restaurant one time, and the idea to make that spurred this recipe.  It uses Avocado as the fat, so you want to make sure your Avos are ripe.  You will need to thin it out with water regardless, but how much depends on ripeness, and how tart your like your vinaigrette, I ended up using almost 1/2 cup.  My avocados I get from a little produce stand on the side of the rode here in San Diego are tiny, but 25 for 5 bucks can't be beat.  I used 2 of my tiny ones, but it was equivalent to 1 normal sized avocado.

Ingredients:

1 Avocado
2 pickled jalapenos whole
1 tsp oregano
3 Tbsp Vinegar, I used red wine because that's what I had on hand
1 tsp garlic powder
1/4-1/2 cup water or pickling juice from jalepenos.
S&P to taste


give you an idea of the size of my avos, that is a teaspoon.

This recipe really is as easy as it gets, basically you throw everything except your liquid into the food processor and blitz it until you get a nice paste, then add the liquid til you get a creamy consistency.  As far as the liquid, I used a 50/50 mixture of the pickling juice and water, as I had used 2 whole jalapenos, to cut the heat down you may use 1, or take the time to remove the seeds, however if you have read my previous blogs, I like spicy food.


Mine was the consistency of a thick Caesar dressing, it still poured, but was super creamy and thick.


As far as what you can serve this over, I am personally using it as a sauce for some blackened chicken for my dinner tonight at work. Served with poached fish would be excellent, or even use it as a salad dressing, although you may want to thin it out more.  The wonderful thing is that the avocado flavor is still pronounced, so those that do like avocados more than I do, will still enjoy this because my goal when cooking is not to mask flavor, but enhance them with other flavors, and make an overall flavor profile that is enjoyable.

Sunday, March 24, 2013

Stuffed Pork Chop with Roasted Cauliflower


The Grocery store had a sale on loin chops, and they had some nice thick ones; they also had some good Italian sausage on the cheap, so I decided I would stuff them.  My stuffing, of course, had to be Keto friendly, so I went with Goat cheese and the sausage. The goat cheese gives it a nice tang, also, it keeps the stuffing moist, and the Italian sausage, I used Hot of course, gave it a nice kick.  I paired it with a recipe for Roasted Cauliflower that I learned from a Chef when I was in culinary school, its simple, and delicious.

Ingredients:
 Makes 2 chops

2 pork chops, 1/5 inches thick
1/2 lb of cauliflower florets
1/2 lemon, zested
2 1/2 oz. Hot or Sweet Italian Sausage
2 oz Goat Cheese
1 tsp onion powder
1 tsp garlic powder
S&P to taste
2 Tbsp Ghee or butter


Preheat your oven to 375°F


I roast the lemon along with the cauliflower, about half way through, you will want to squeeze the juice over the florets.

 On a baking sheet, lay your cauliflower florets in an even layer, sprinkle zest of the half of lemon,  and toss to evenly coat. stick in the oven. Then move on to your chops.


make sure you don't go all the way through
Start by taking the pork chops, and on the non-fat side make a slit with a sharp knife, from one end to the other.  make sure your pork chops are at least 1.5 inches thick, any thinner and the pork will dry out before the stuffing is fully cooked.


Stuffing, so versatile, so delicious.
Once you have made the slits, remove the sausage from the casing and take half and put into your mixing bowl along with the goat cheese.  With a fork, mash the cheese and sausage together until they are evenly incorporated.


Take half of the mixture and fill each chop, it should be stuffed nicely, but not overflowing, if yours are smaller chops, you may have enough for 3 chops.  Take toothpicks and stick them through to hold the opening together. In a cast iron or stainless steel pan, add the ghee and sear each side, and stick in the oven stuffing side up, to prevent leakage.

you want the temp of the stuffing to be 165°, so pull them from the oven when they are 155° and let rest for 5-10 min, covered. The carryover cooking will bring it up to the needed temp. Remove the florets from the oven, and again squeeze the roasted lemon juice over them.

done.

And of course, a shot from the middle.
 

6 grams of carbs, 33 grams of fat and 51 grams of protein.

Ghee: You won't believe its just butter


Ghee is a type of clarified butter that is a staple of Indian and Pakistani food, and a sacred oil used in Vedic rituals as a sacrifice to Agni, the spirit of fire.  But this is a cooking blog, so I will leave the Theology out of it.  It is also the main reason your Indian food at home never is quite as good as it is in the restaurant.  While it is clarified, the method of which it is made is different than how the french make it. While the french method simply melts the butter, and skims the fat out, Ghee is prepared by melting whole unsalted butter, then letting the whey evaporate leaving milk solids and fat, you then let the milk solids brown, giving the fat a nutty flavor, and golden color. simply put, its delicious.

Ingredients:
1 pound of butter

the pound of butter I got came in 4, 4 ounce sticks, unwrap your butter and put it in a sauce pan over medium low heat.

after about 5 mins it will start to melt, you don't want to let it melt to quickly by turning the heat up, this is where patience will be rewarded.


once the butter is completely melted, you want to let it come to a boil, well, you want the liquid under the layer of fat to boil, once it is evaporated, the foam on top will start to sink to the bottom of the pan and turn brown, when the milk solids on the bottom are a nice nutty light brown, remove and strain through cheese cloth or a fine mesh strainer.  or a paper towel works fine too.
this is the Ghee, as you can see it is darker than your normal clarified butter you see served with lobster, it also smells slightly of toasted almonds, 1 pound of butter results in roughly a pint of Ghee

Most recipes for Ghee will tell you to discard the milk solids, but as a Ketoer, I have a use for these, so I save them.  the use will be the subject of a future blog, so for now, it's a secret...but trust me, you will want to save these. let them cool and put them in a food storage container then stick them in the fridge.

Friday, March 22, 2013

Barbacoa with Greens


Working late doesn't mean I don't want something filling and tasty when I get home.  The difference is I really don't have the desire to cook at 9pm, enter, the slow cooker.  The slow cooker, also known by many as a Crock Pot, is a great tool for those who don't have a lot of time, but still don't want to rely on fast food, or frozen diners.  A favorite of mine is Barbacoa, you may have had something called Barbacoa at Chipotle, well I can tell you, their dried out stringy meat is so far from the real deal. The real stuff is juicy, fall apart tender, and full of spice and heat. This will be a shorter blog, as it is a simple dish.

Ingredients

2lb Chuck Roast
1/2 a medium bell pepper
1 stalk of celery
1/2 bay leave
1 tsp cumin
1 tsp chili powder
1 tsp garlic powder
1 tsp onion powder
1 tsp cayenne pepper

1 cup beef broth
1/2 cup water or enough to come half way up the meat.

 S&P to taste
This big hunk of chuck roast is excellent, stands up to the long low cooking time, and is one of the flavorful cuts of meat when cooked properly. 
Rough chop the bell pepper and celery, I used the stem end of a stalk, but 1-2 good siz stalks would work also. I coated the meat with the spices, then added a bit more cayenne to give it an extra kick, but I like it hot! pour the liquids in, put the lid on, and set your slow cooker to low for 12 hours, or high for 6-8 depending on how hot it gets.
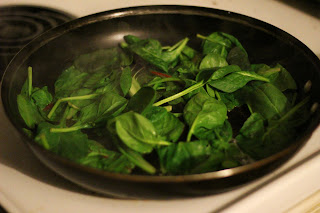
Fast forward 8 hours, and its time to fix some sides.  I was going to originally serve this with some Cauliflower mash but upon inspection of my cauliflower, it had gone bad.  have no fear, when life gives you bad cauliflower, use Leafy greens instead.
When you can get Bokeh in the photo off of the shine of the fat, you are doing it right. after 8 hours in the slow cooker this hunk of cow was fall apart tender, and not dry at all. 
I put the sauteed greens on the bottom, then served it with sour cream, Cotija cheese, and a few dashes of hot sauce, I used Tapitio, Cholula would have been exellent, or even the Chipotle flavoed Tabasco, if you want a little smokeyness.


<1 net carb, and packed with protein, fat and minerals.
This recipe is great for all sorts of different things, I love to chill it overnight, then mix it with some eggs and bacon and make a meat lovers scramble in the morning.


Thursday, March 21, 2013

Southwestern Egg Bake

Finished Product


Breakfast Edition...

My schedule, just like everyone else's is constantly changing, on days like today when I work until 8:30, the last thing I want to do is cook dinner.  That said, working late means giving me an excuse to make a decent breakfast!.  These "Crustless Quiches" are fantastic, easy to make, and are packed with what every Ketonian needs to start the day...FAT.


Makes 3 Servings of 2 Mini Quiches

Ingredients:

2 slices of Bacon, chopped
3 eggs
3 Tbsp Heavy cream
2  Tbsp Parmesan Cheese
1/2 medium bell pepper diced
1 cup of frozen chopped spinach
1/4 tsp chili powder
1/2 tsp garlic salt
1/2 tsp onion powder
S&P to taste

Preheat oven to 375°F

I keep my bacon in the freezer, it stores well, and is a cinch to chop when frozen.  Take your bacon strips and cut them into 1/4 in strips.  In a skillet, I like to use nonstick for bacon, start rendering out the fat.

PROTIP: To render out as much bacon fat as you can, add 1/4 c of water to the pan along with the bacon.  as the bacon starts to simmer in the water, it will release a lot more fat, the water will evaporate, and the bacon will then fry in the fat that is left in the pan.  kind of like potstickers, but tastier.


Once the bacon is about half way done, add the bell pepper and sweat until the pepper is tender, but not mushy.

While the bacon and bell peppers continue to cook, in a mixing bowl add the eggs, cream, cheese and seasonings and whisk vigorously until they are well incorporated

 
I scream, You scream, we all scream for eggs & cream!


Add the Spinach to the bacon and bell peppers and saute for 1-2 mins.

I fly solo on most meals, so I portion meals out accordingly.  At the same time I also am a visual eater, and if my food looks good, it tends to taste better as well,  call me neurotic.  So I use a muffin pan to make mini "Quiches", but you can use a small baking dish or multiply the recipe to make a larger batch in a pan.

Grease the muffin cups and divide the vegetable mixture and scoop it into the bottom of each cup, then pour the egg mixture in evenly.

This pan has some milage on it, but it is a staple in my culinary toolbox.


Bake at 375° until the Quiches are puffy and slightly browned on the top.

This is the point where you would add cheese on top, I didn't have any on hand.

Serve with your favorite hot sauce, I used Sambal, which is a staple of mine, its a Indonesian/Malaysian chili paste, by the same company that makes Sriracha, but it blows Sriracha out of the water in my opinion.


Wednesday, March 20, 2013

Herb Crusted Chicken with Creamy Lacinato Kale

Ingredients:

1 Chicken Leg Quarter Bone in.
4 stocks of Lacinato Kale
1/3 c Heavy Cream
2 Tbsp Parmesan Che
2 Tbsp Butter
1 Tbsp Vegetable oil
1/4 tsp dried Rosemary
1/4 tsp dried Oregano
1/4 tsp dried Parsley
1/4 tsp dried Thyme
1/2 tsp Garlic Powder
1/2 tsp Onion Powder
1/4 tsp Red Pepper flakes
S&P to taste

Let me first explain Lacinato Kale.  You might see it as Dinosaur Kale or Tuscan Kale, and if you cannot find it, normal Kale, or any hearty leafy green will work just fine.  I prefer Lacinato to normal Curly Kale because it is a bit less bitter.  either way, you want to end up with about a cup of the final product.

Prep:

Preheat your oven to 350°F 

Combine dried herbs, garlic, and onion powder in a spice grinder and grind to a fine powder. if you don't have one, a mortar and pestle, or even in you hands will work just fine, you will just need to use a little more elbow grease.

Once ground, liberally coat the chicken on both sides, with the rub and S&P.

Like this.


In a cast iron or stainless steel pan, add 1 Tbsp of Butter and 1 Tbsp Vegetable oil, and bring to just a slight smoke, add the chicken skin side down and sear 4-5 min, or until the skin is crispy. at this point you want to flip it over, and sear the other side for another 4-5 min. once nicely seared, put the chicken into your preheated oven and roast until the internal temp is 155°F.(68°C). Carryover cooking will continue to raise the internal temp to 165°F(74°C) that is the safe temp for poultry.

Place on the middle rack for even circulation of heat.
 
While the chicken is roasting, take your kale and remove the leaves from the stems.  Some greens you want to keep the ribs on, but with kale they are too fibrous to eat.  Once you have them removed, chiffonade the kale and set aside.


Make sure to put a damp cloth under your board to prevent slipping.


In a saute pan add the 1Tbsp of butter, and once melted add your kale, Salt, and Red Pepper flakes.  I like it spicy so I use more than 1/4 tsp, you can also omit them all together if you do not like spicy food.  Once the greens are sweated down, add the heavy cream and continue to cook until the kale is tender.  To speed the process up a bit you can blanch your kale ahead of time, but shredded this fine it shouldn't be necessary. Once the cream is reduced add the parm and continue to stir, the parm should thicken the cream up nicely, and turn it from a sauce to a side dish, either way you can reduce the cream to your desired thickness, I like mine thick.

Mac and cheese?? Ha please
Remove the chicken from the oven once it reaches the safe temp, and let it rest for 5 min. Optional (and delicious) take a pat of butter and place it on the chicken as its resting.  When the butter melts it will infuse with the herbs and chicken fat to give a great sheen to the crispy skin.

G.B.A.D. as Alton Brown would say.

 Once plated pour the now melted butter over the chicken.  and enjoy.

Finished
Not something I would eat every day. But dang tasty.